Note: If you want to perform a SwitchBox relay test, please see this article
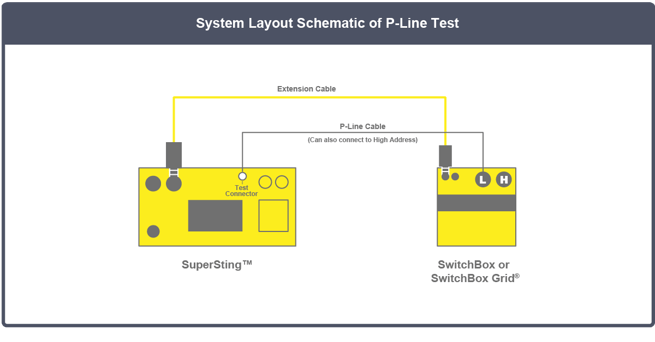
- Make sure that no electrode cables are connected to the SwitchBox. Connect the SwitchBox to the SuperSting™ with the yellow extension cable.
- Connect the P-Line testing cable or use a single wire cable connected from the test connector to the low or high address section connector as seen below. (Note: You can purchase a P-Line testing cable from AGI if you do not have one) If you want to test each pin, you can also use a single wire cable from the test connector to each pin on the low or high address section connector.
- Power the SuperSting™ with an isolated 12V battery or AGI power supply and generator connected to an ungrounded generator. NEVER use a battery attached to a car as this easily damages the systems and invalidates the tests.
- Turn on the SuperSting™and Select Menu 3, then press 2 on the keypad.
- Enter the starting and ending address (Example: 1 and 56 if you have a SwitchBox 56).
- Press F1 to start the test for the current first electrode pin. It will show 'Pass' for all 8 channels.
- Repeat step 6 until all electrode addresses are completed.
If any pin fails during testing, please contact your AGI representative.