How do I connect my SuperSting Wifi to the SuperSting Manager App?
Follow the steps below to connect your SuperSting Wifi to the SuperSting Manager App running on your Android device.

Connecting to the SuperSting to the App:
- Turn the SuperSting on.
- Ensure the following:
- Wi-Fi mode on your SuperSting is turned on. The communication switch is located near the power switch. It has a PC COM position but should point towards the Wi-Fi position (to the left).
- The Wi-Fi antennae is installed securely into the antenna port on the upper right corner of the SuperSting faceplate. The antennae should point straight up.
-
- Red indicator light shows Wi-Fi is operating.
- Go to menu M6 (System Settings), and then press 4 to make sure that the SuperSting is set to communicate at 38400 baud. If it is not, change it to 38400.
- Back out to the main menu by pressing the MEN key twice. You must be in the main menu for the SuperSting Manager App to connect.
- On the Android device, go to Settings, then Wi-Fi, and select SuperSting.
- Enter the Security code for the SuperSting Wi-Fi: SuperSting01 (Note that it is case-sensitive and the last two are zero and one). Tap Connect.
- Android updates are known to occasionally block location access and WiFi SSID. Please make sure AGI SuperSting Manager is allowed to operate. Go into Android Settings | Apps and select the SSM app. Turn on all permissions for the SSM app. Restart the SSM app.
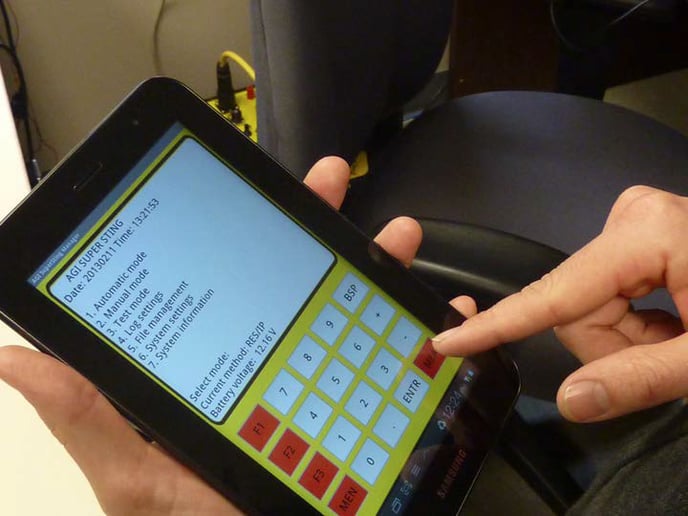
- On the Android device, tap the AGI icon. Once the app launches, tap Remote Control to gain control of the SuperSting. The virtual key pad and screen will mirror what you see on the LCD console itself. The virtual keypad will turn gray when the App is sending commands to the SuperSting which means it is unavailable for more key presses. Installing the antenna and being close to the SuperSting with few other WiFi devices nearby speeds up the communication.
- Files are now stored HERE on the latest version of Android if you plug your USB cable into a Windows PC.

