![AGI-logo.png]](https://helpdesk.agiusa.com/hs-fs/hubfs/AGI-Apr2016_Theme/img/AGI-logo.png?height=40&name=AGI-logo.png)
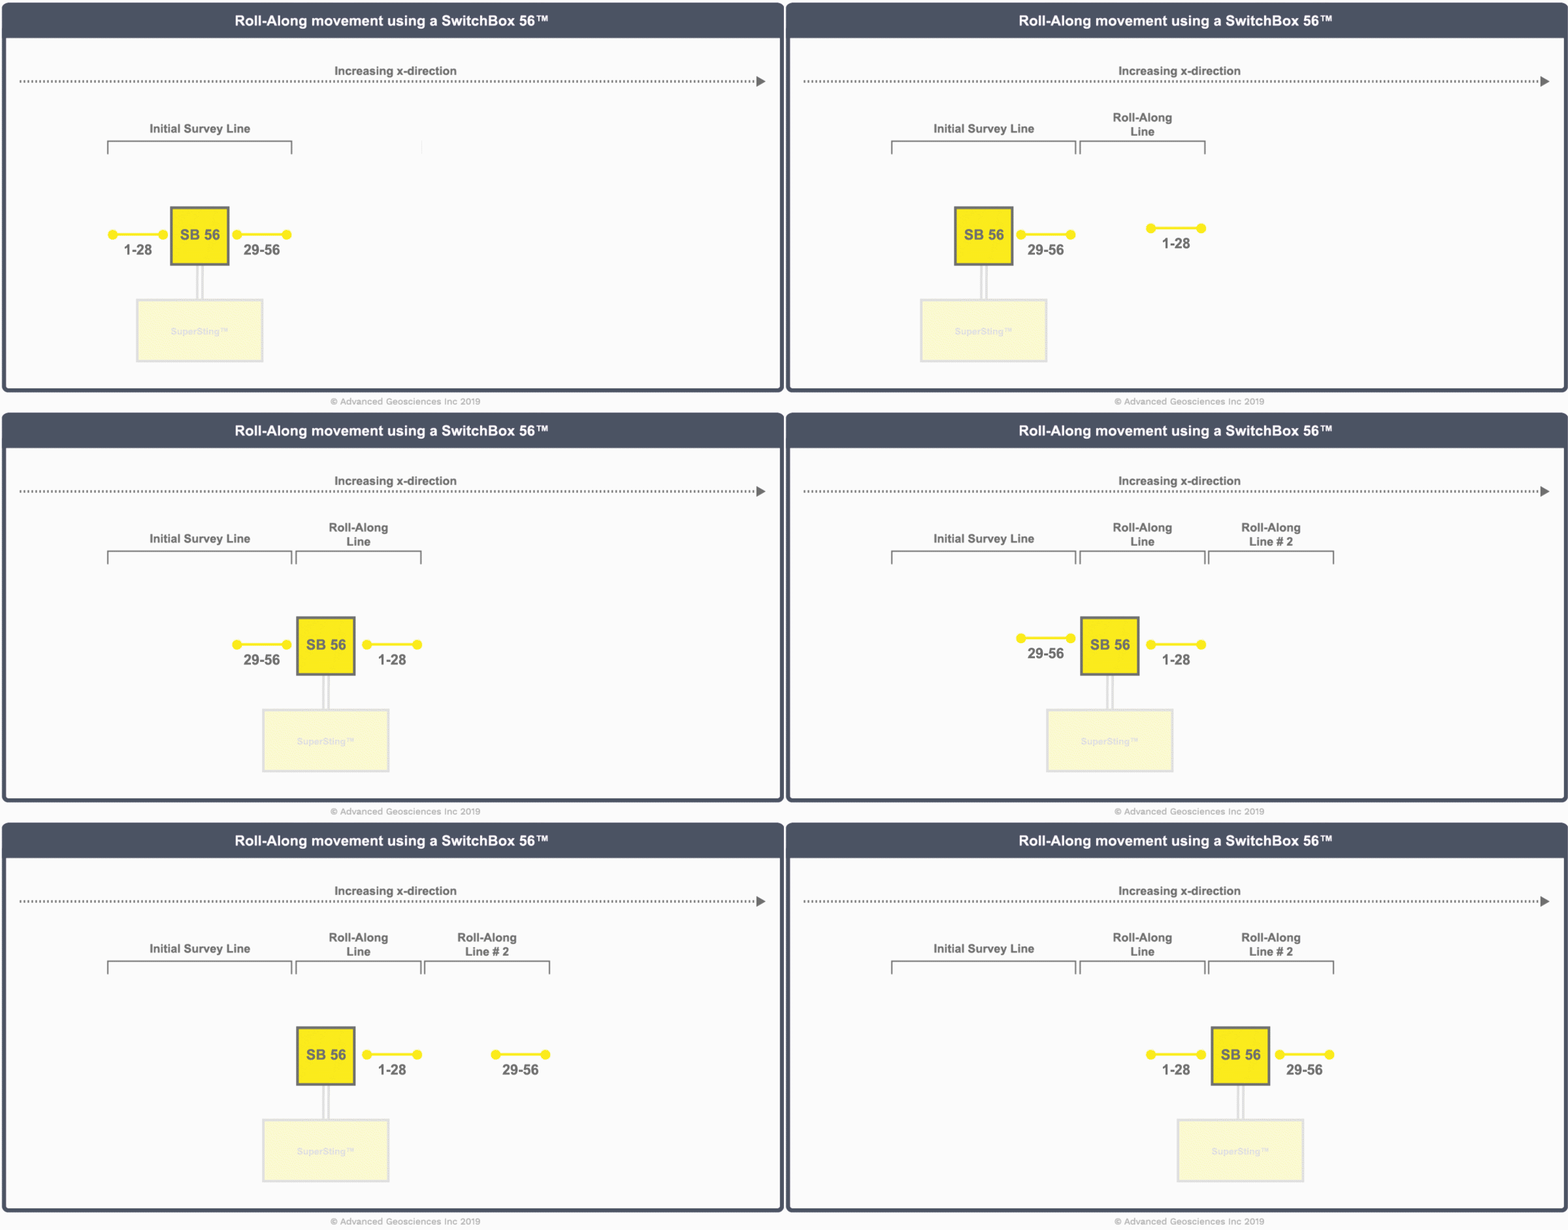
Tip: Always place your SuperSting™ in the middle of your passive electrodes for easier roll-alongs when running the full spread i.e. 56 electrodes on a SwitchBox56. Do not put the Switchbox in the middle of a partial SwitchBox deployment.
- On the main menu of your SuperSting™, press 2 to create a new data file.
- Enter a file name.
- Select the desired command file, which you have previously uploaded.
- Enter Scaling Factor (your electrode spacing)
- Enter the Units (Feet or Meters)
- Enter the Start X, Y and Z = 0
- Keep pressing 'Enter' to get down to the Roll-Along option. You can activate or deactivate roll-along by using the Up arrow key or the Down arrow key. To activate, toggle to 'Yes' and then press 'Enter'. Select 'Enter' again to go to the next screen.
- End Address = OFF (enter a zero if another number is here to change to OFF)
- Press 'Enter' to continue setup
- Select your Switch System type (R1 or R8) using the 1 & 2 keys.
- Select your SwitchBox (Your previously used SwitchBox may need to be cleared). Use the Up arrow key and the Down arrow key to toggle your options. Select 'Enter' when finished. Next, select 'Men' to exit.
- On the next screen, set up your cable address. Remember, the number of electrodes per cable section you want to roll/pickup on the ground must match the number of electrodes in each cable section entered! Do not automatically enter the smallest section size that your cables were ordered with.
Example 1: You have 4 cable sections of 14 electrodes each, but want to roll 28 electrodes at a time on a SwitchBox 56 system (50% rolls) for faster movement.
- Section 1: Low = 1 and High= 28
- Section 2: Low = 29 and High = 56
Example 2: You have 8 cable sections of 14 electrodes each, but want to roll 28 electrodes for a finer overlap of 25% to minimize data gap at depth but move a little slower than the 50% overlap mentioned above.
- Section1: Low = 1 and High = 28
- Section 2: Low = 29 and High = 56
- Section 3: Low = 57 and High = 84
- Section 4: Low = 85 and High = 112
Three Import Tips to Avoid Scrambled Roll Along Files or Missed Roll Advancements
- Recent SuperSting™ firmware versions will automatically advance the roll-along at the end of the measurements on each roll and simply ask the user to turn off the system to continue the roll-along. Older firmware will ask the user to press 'Enter' to continue the roll-along and then turn off. Both will advance the rolls based on whatever Cable Address Table is entered (as mentioned above).
- You will know that a roll-along file has advanced correctly when the Start X goes from 0 to the correct linear distance for each new roll. That is, if you are rolling 28 electrodes and your spacing is 1m, each roll will move the Start X value 28 more meters as shown on the main display screen during Automatic Mode. In other words, the first main file will show Start X = 0m and then the first roll will show Start X = 28m, etc.
- When looking at the SwitchBox, the left side of the line is always the Low Address Port despite the numbering on the cable. And the right side is always the High Address Port.
Quality Control During Roll Along
You can download your data files (STG, CRS, CMD) after each roll and check data quality with EarthImager2D. The optimal scenario for a high production roll along survey is to download several times after a roll has completed within a longer roll along file so that you can check data quality.
Partial Repeat of Roll Along
If the majority of your roll along file has good data quality and then an issue occurs related to improper roll size movements or connections, you can recollect this portion only and save the good data with a manual advance function. This requires that you start a new file and place the cables back where the issue occurred.
Trim the bad rolls from your first roll along file with EarthImager 2D Tools> Extract Sub Data Set. 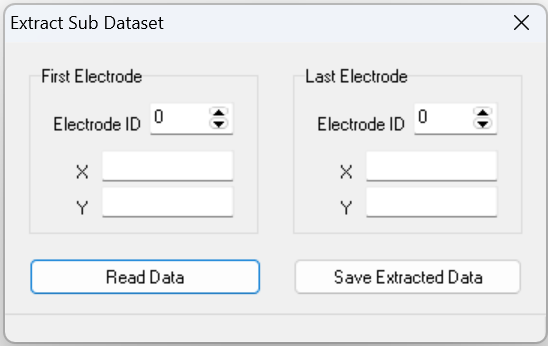 A The sub data set Read the STG file and then enter the Start Electrode of 1 and the last good measurement electrode # at the end. Save Extracted Data as a new STG file for merging with the repeated rolls later.
Installing Partial Repeat of Roll Along
- Install your cable sections at the StartX where the issue occurred and in the correct rolled position. Double check Cable Address Table, SwitchBox size and section placements.
- Make a new file with exactly the same setup as the file you just trimmed including setting the start X to zero (StartX=0)
- At the last menu in Automatic Mode where you normaly would press MEA (measure) there is a menu item #3 "Edit survey information" that is needed
- Select #3 Edit survey information > #7 Advance roll-along:
- Enter a whole number value for the number of rolls you need to advance the file
- The start X shown at item 1 will advance to the correct Start X where your cables are positioned.
- Measure this manually advanced roll along file and continue rolls as neeeded. Merge it with your prior trimmed roll along file for a continuous full roll along.
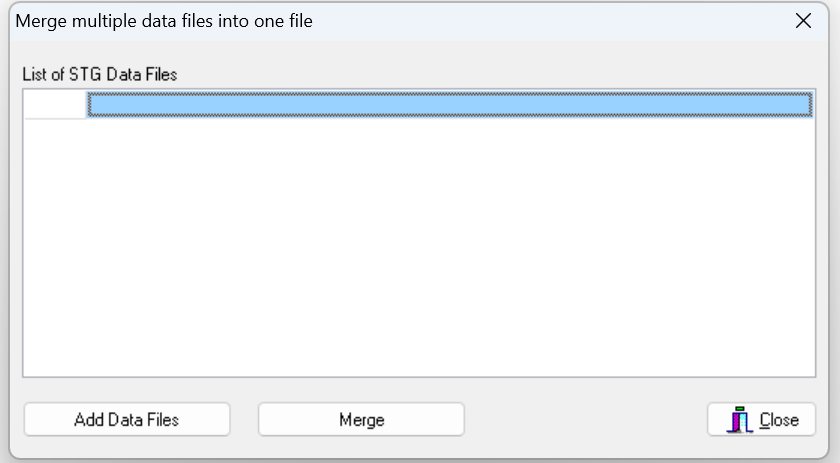
- The merge function is under EarthImager2D> Tools > Merge Data (add 2 or more STG files and save)
Example: Using a SwitchBox56™ with a Cable Address Table entered as two sections of 28.